Xesto with Unity TV tutorial
Welcome to Xesto,
In this tutorial we will go over how to create a Unity App using out Xesto Api, You can find all the code and api for this in our Unity package. In this tutorial we will go over how to do this.
Making Gestures
After you import following the setup page, log into our portal and start making the gesture you want to create and record the gestures. Make sure they are sufficently different to ensure that your app works the way you want. Make sure you make at least 5 gestures because recognition won’t work if there are less than 5 gestures.
For tutorial purposes we have 5 gestures with the names
- Circleright
- LiftDown
- LiftUp
- Swiperight
- Swipeleft
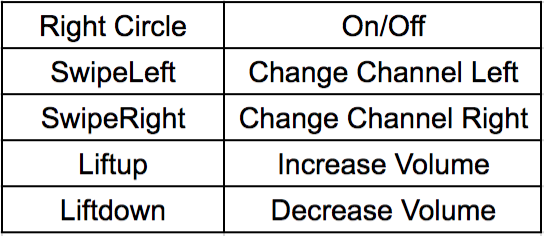
As you can see in the picture above, a tv should be able to change channels, increase or decrease volume and turn on and off with the off not having anything to change. Thus we can map our gestures as
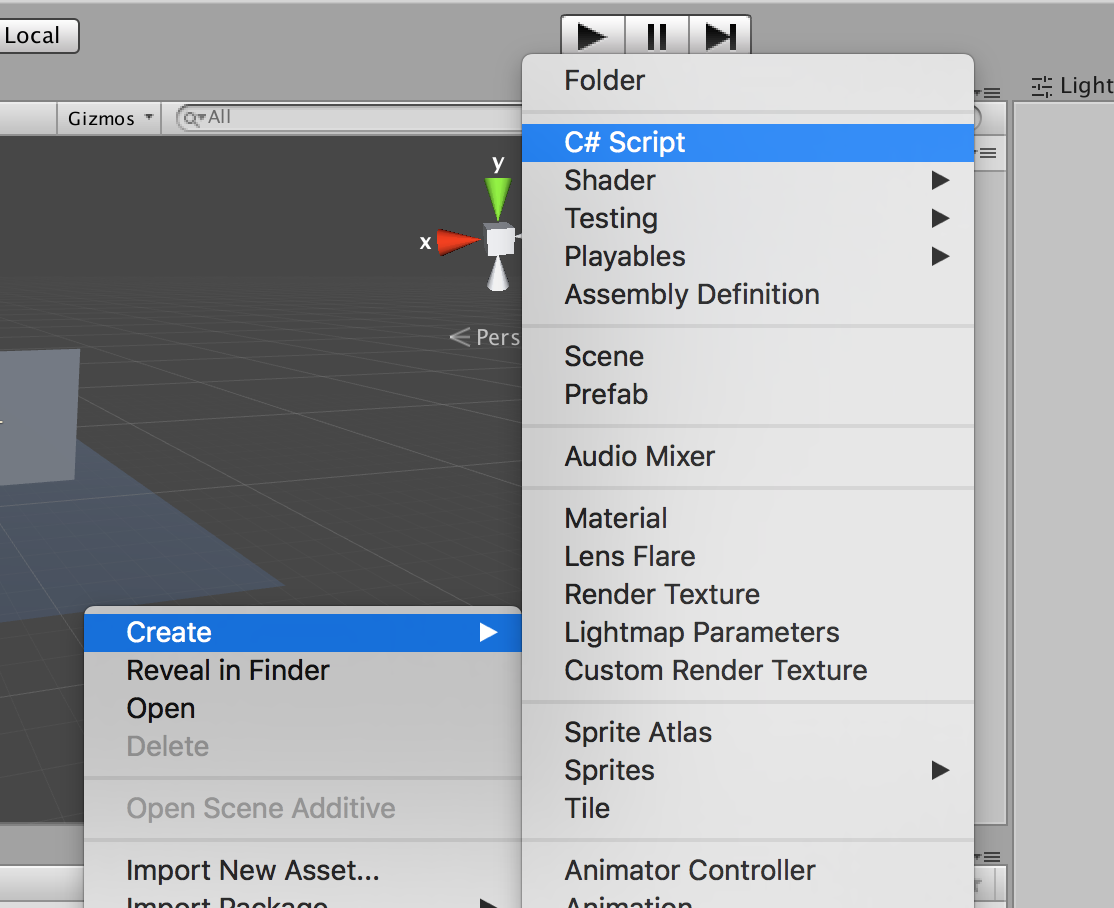
Once we have at least 5 gestures recorded, we can start writing a new C# script in your Unity editor,
Unity Scripting
Create script in unity
Add import in script
using XestoGestureApi;
Make xesto class variable
public class PrefabScript : MonoBehaviour {
    private Xesto xesto;
Add the following in the start method
void Start()
    {
    xesto = new Xesto("<your API Key>");
    Xesto.logger = (str) => { Debug.Log(str); };
  }
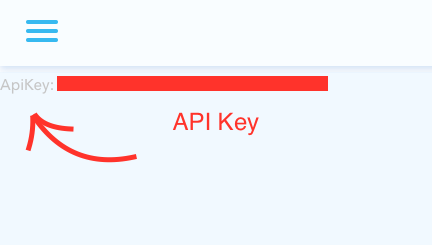
Use your own API key found here
Add listeners and xesto.Start() to the Start() method
    xesto.AddListener("LiftDown", () =>
        {
            down = true;
        });
    xesto.AddListener("Swipeleft", () =>
        {
            left = true;
        });
    xesto.AddListener("LiftUp", () =>
        {
            up = true;
        });
    xesto.AddListener("Swiperight", () =>
        {
            right = true;
        });
    xesto.AddListener("Circleright", () =>
        {
            signal = true;
        });
    xesto.Start();
To add functionality to the television add the following code to the update function.
    void Update()
    {
        xesto.Update();

        if (signal == true){
            if(on == true){
                turnOff();
                on = false;
            }
            else{
                turnOn();
                on = true;
            }
            signal = false;
            if (left == true){
                if (on == true){
                    changeChannel("left");
                    left = false;
                }
            }
            else if (right == true){
                if (on == true){
                    changeChannel("right");
                    right = false;
                }
            }
            else if (down == true){
                if (on == true){
                    upVolume("down");
                    down = false;
                }
            }
            else if (up == true){
                if (on == true){
                    upVolume("up");
                    up = false;
                }
            }
        }
Make a OnDestroy() method and add the following
    private void OnDestroy()
    {
        xesto.Dispose();
    }
Unity Stuffs
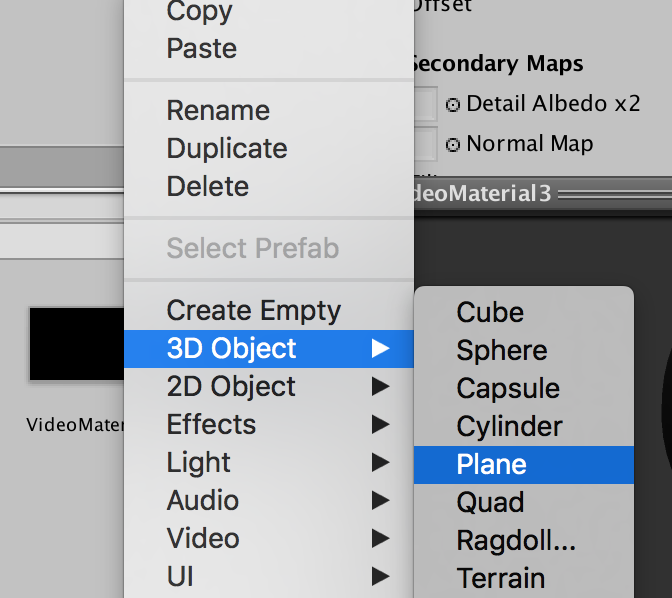
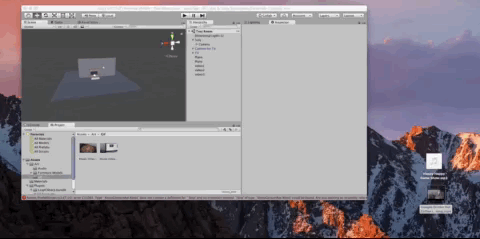
Making the TV
Add a plan eand rename it Screen
Add the free furniture assets here
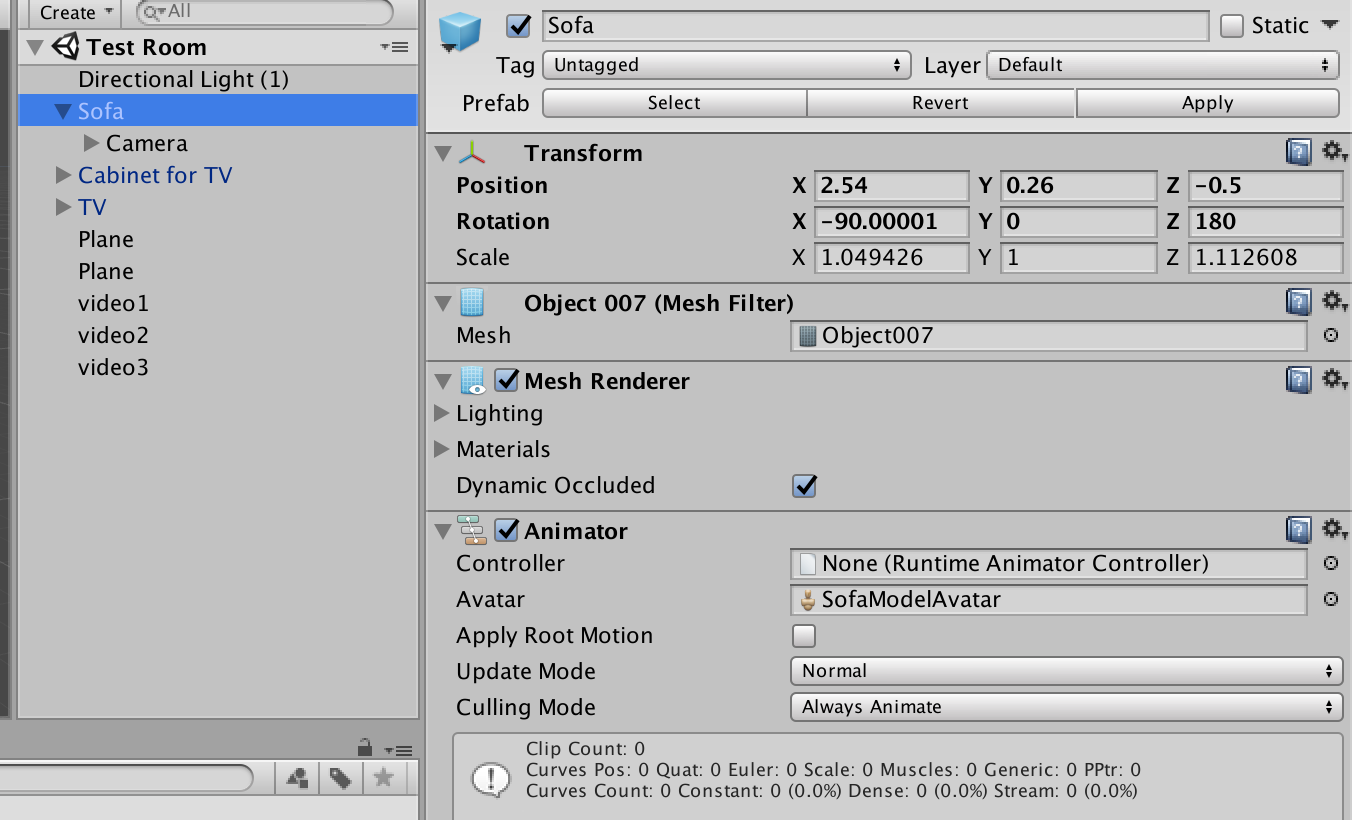
Then move the screen so that the visable portion of the screen is facing outward of the television. Then move the camera wherever you want. In our example, we attached the camera to the sofa like below
Add the game object to the begining of the script
private GameObject screen;
Add this to the Start() method
screen = GameObject.Find("Screen");
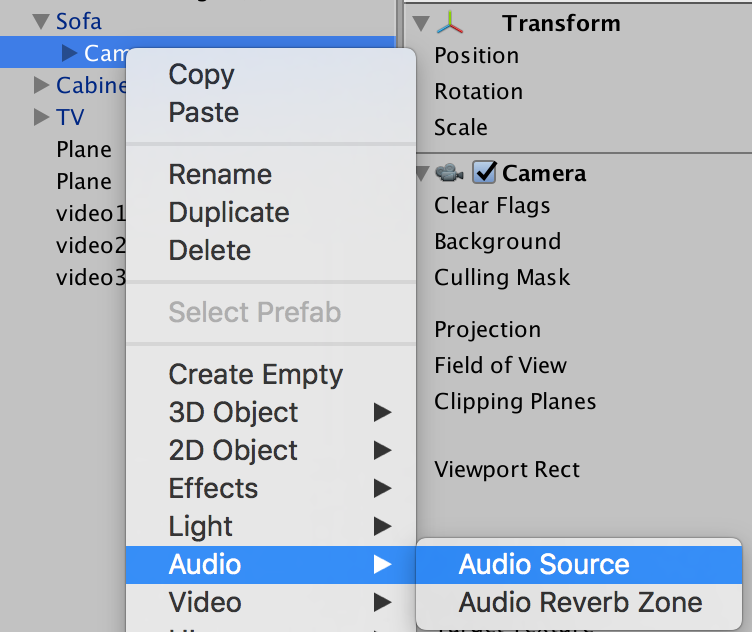
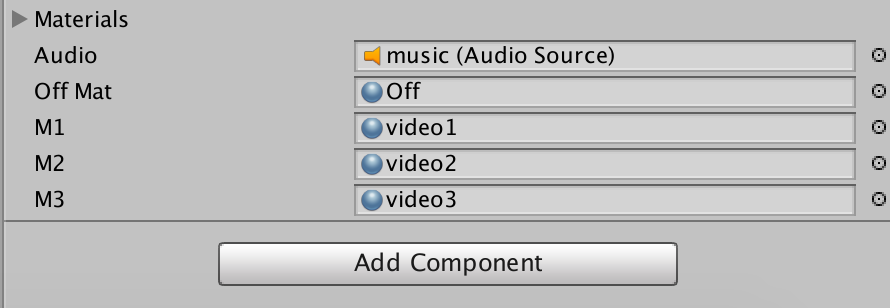
Add an audio source to your camera and rename it music
Add some music, you can find some from Kevin Mcleod.
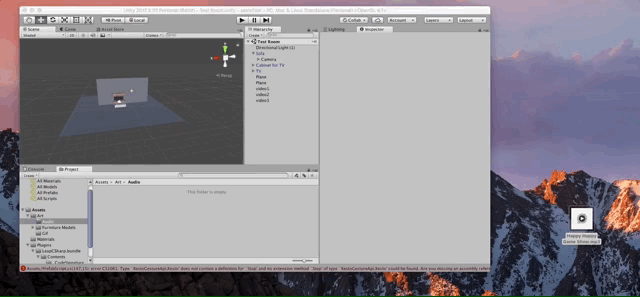
Drag the music to Unity

which would result in
Add another variable to the head of the script
public new AudioSource audio;
Attach the music to the script like the following

Making Channels
Add the following public variables to the head of the script
    public Material offMat;
    public Material Channel1;
    public Material Channel2;
    public Material Channel3;
Make a material list at the top of the script
public Material[] channels;
then in the Start() method
    void Start()
    {
        channels = new Material[]{Channel1,Channel2,Channel3};
    }
Get some vidoes as MP4's here
Then in the hierarchy create the video player

Create two more
Add your clips to Unity
add the clips to the videoPlayer
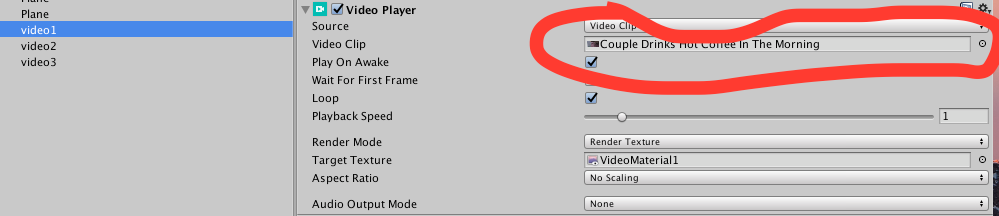
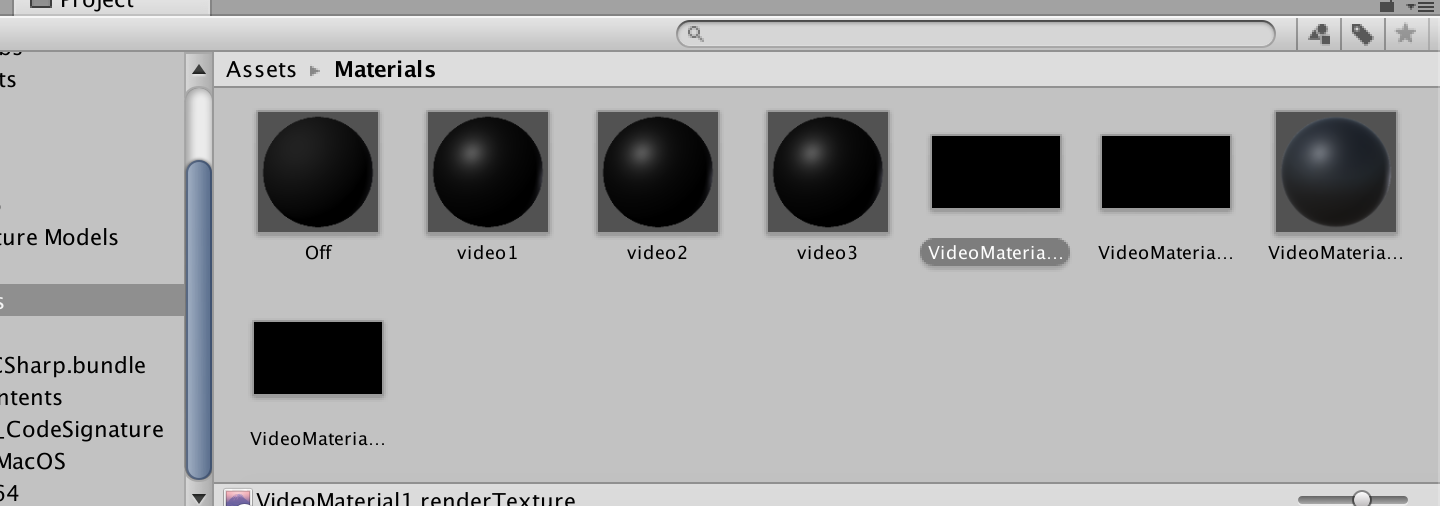
Create a renderTexture call it VideoMaterialTexture, three times
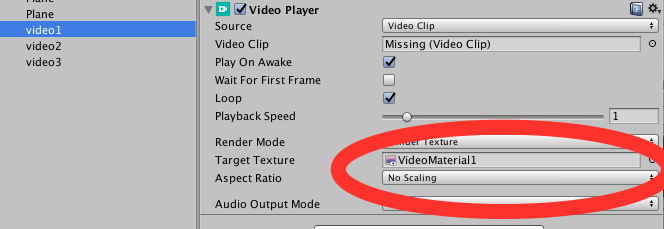
Add the rendertexture to the video Player
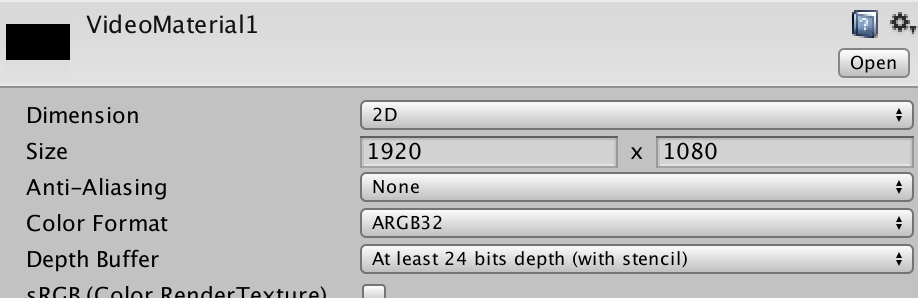
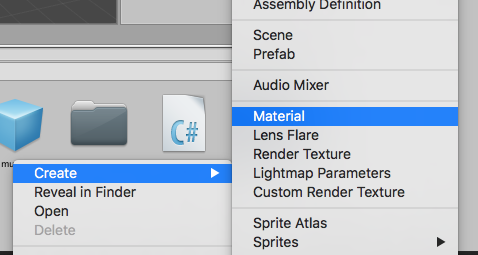
Make a new Material and rename it video1
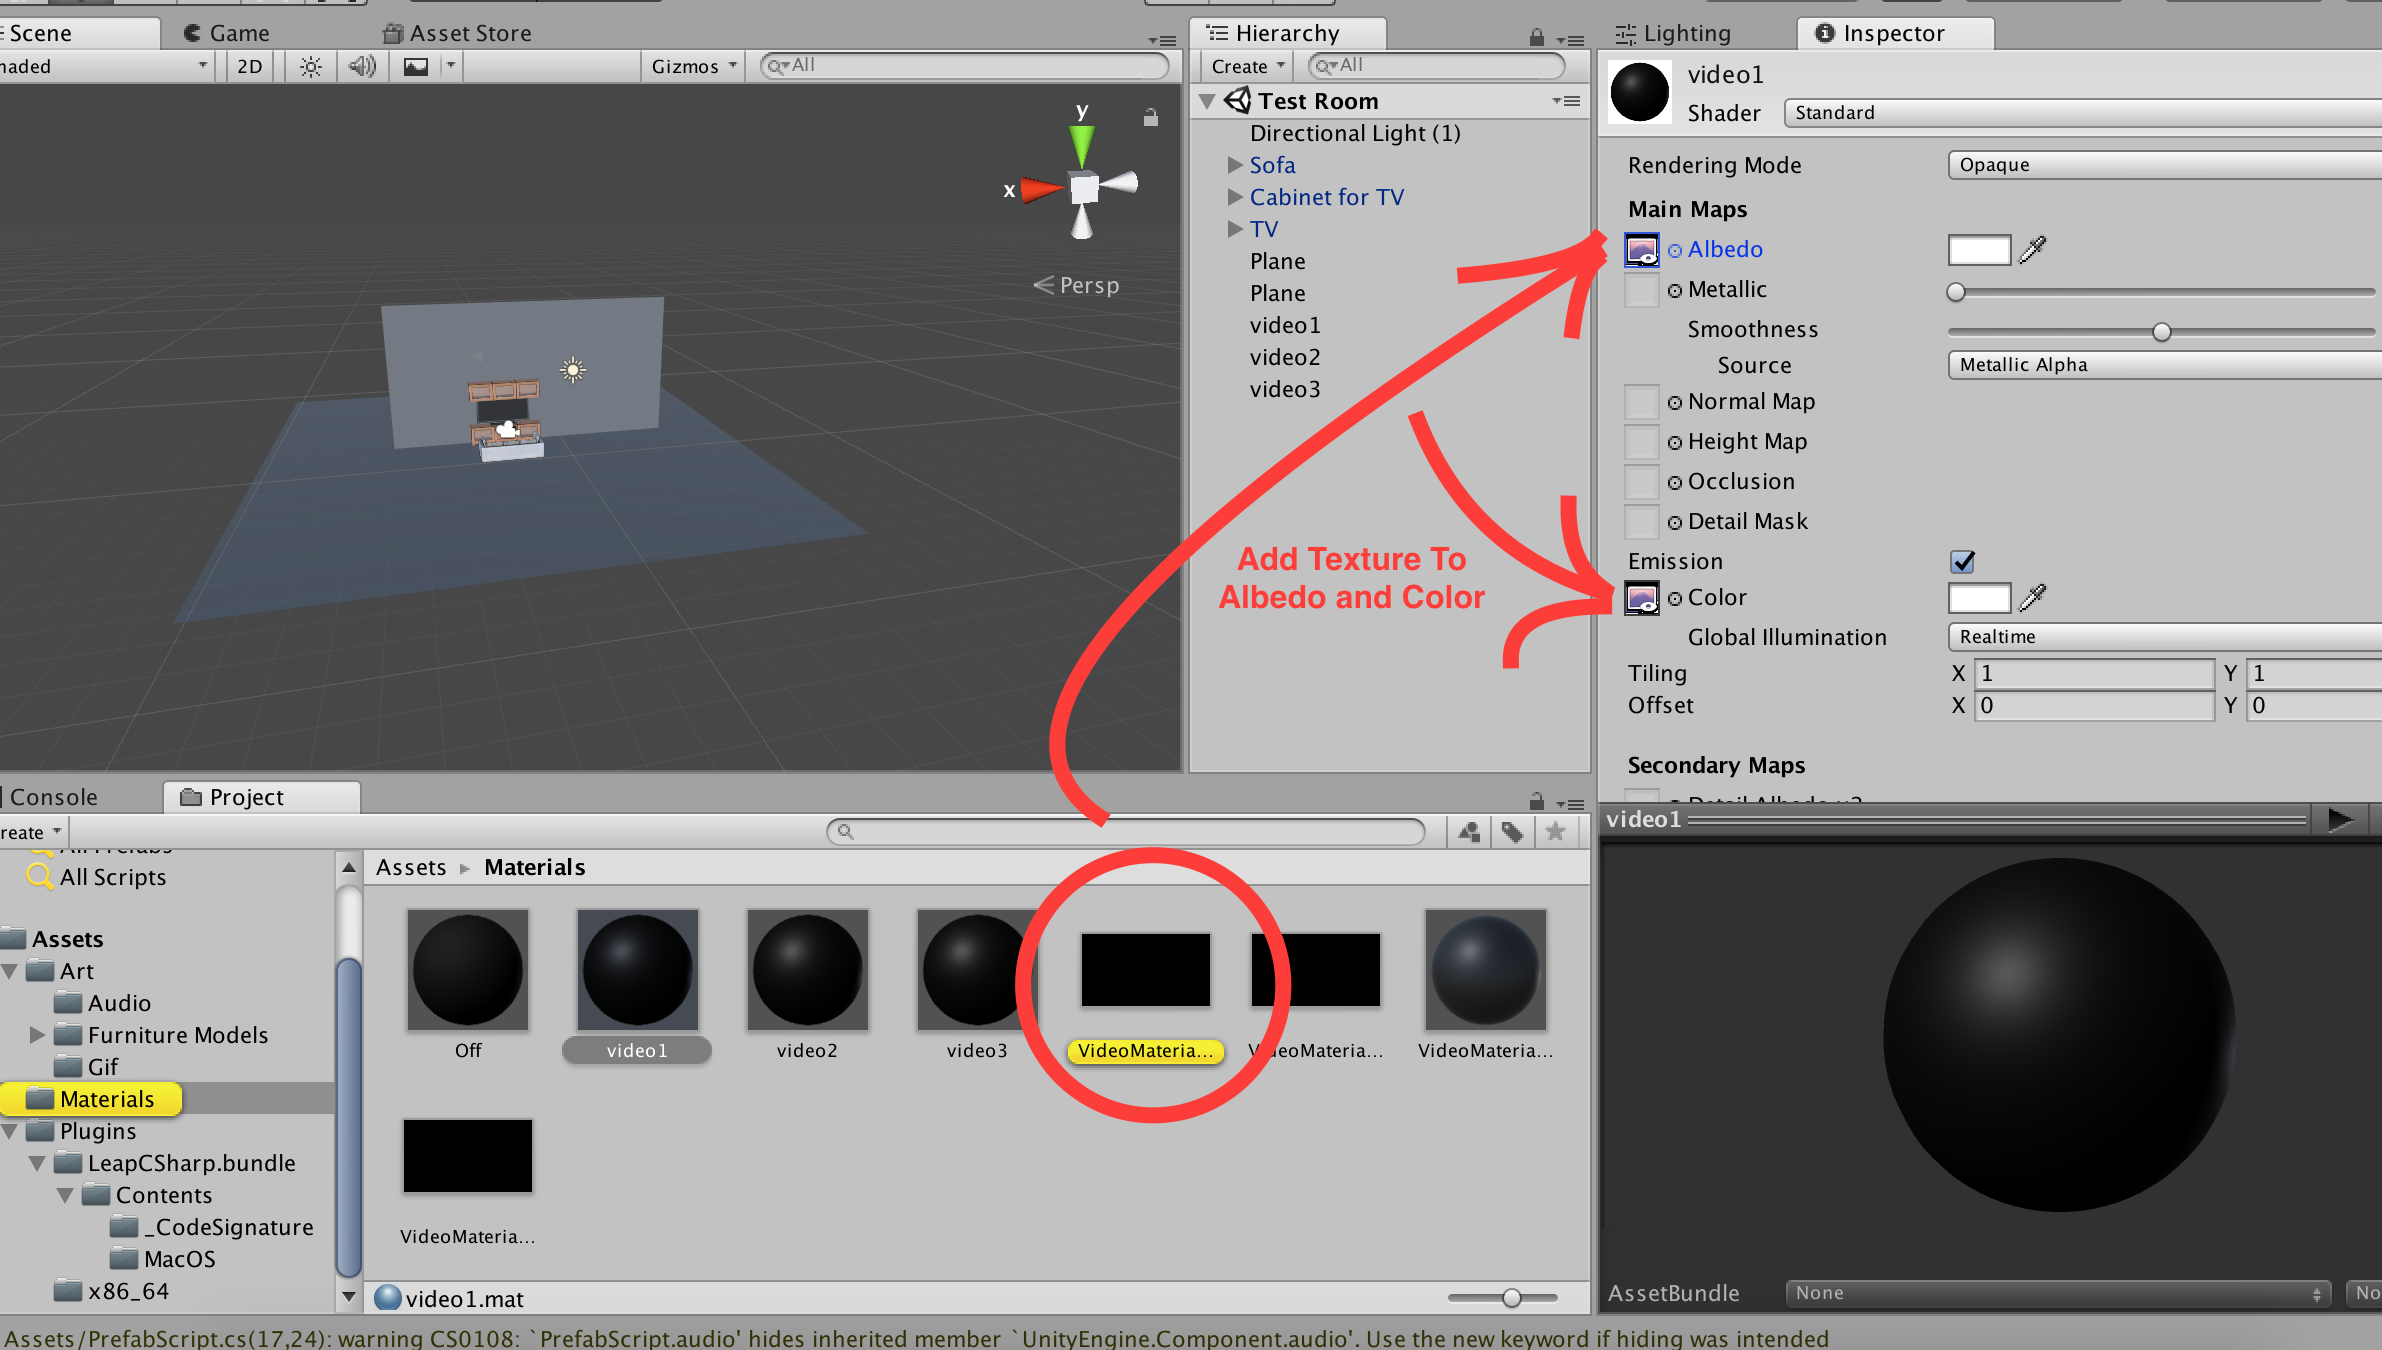
Add the renderTexture to albedo and emission of the material
Make another material and rename it Off
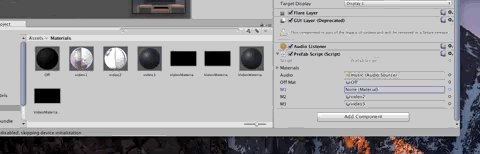
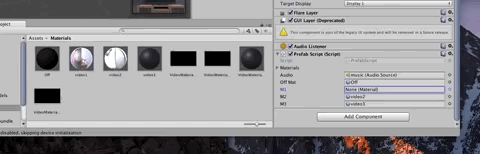
In the script section of the camera drag the materials
Move the off material as well
Making some actions
So we need to create the following functions
- turnOn()
- turnOff()
- upVolume()
- changeChannel()
turnOn()
Create a turn on function as below
void turnOn(){
    screen.GetComponent<Renderer>().material= channels[colorCount];
    if (!audio.isPlaying){
        audio.Play();
    }
}
turnOff()
Create a turnOff function like below
    void turnOff(){
        screen.GetComponent<Renderer>().material = offMat;
        if (audio.isPlaying){
            audio.Pause();
        }
    }
changeChannel()
Add the colorCount variable to the top to the script
private int colorCount = 0;
Create a changeChannel function like below
    void changeChannel(string direction){

        switch (direction){
            case "left":
                colorCount = (colorCount + 1) % 3;
                screen.GetComponent<Renderer>().material = channels[colorCount];
                break;
            case "right":
                colorCount = (colorCount - 1) % 3;
                if (colorCount < 0){
                    colorCount = 3 + colorCount;
                }
                screen.GetComponent<Renderer>().material= channels[colorCount];
                break;
            default:
                break;
        }
    }
upVolume()
Create a changing volume function called upVolume like below
void upVolume(string direction){
    switch (direction){
        case "up":
            audio.volume = audio.volume + 0.1f;
            break;
        case "down":
            audio.volume = audio.volume - 0.1f;
            break;
        default:
            break;
    }
}
Add the script to the camera
and add the script or drag the script onto the camera object.